Attended an excellent workshop given by Terry Howell Stanley, http://terrystanley.com , through the wpa (Wisconsin Pastel Artists) http://www.wispa.us
Brief discussion of materials and having enough respect for yourself and your work to use professional grade materials that will last.
A lot of different kinds of pastels:
- Terry Ludwig - terryludwig.com
- Unison by Richeson, richesonart.com : besides their soft unison pastels they now supply colorfast version of a hard (like nupastels), medium (a little harder than rembrandt) and hand rolled (very soft but a little less than unison) pastels.
- pastlesgirault.com - a little harder, have a set of 72 gray which is great for animals
- Holbein - a little harder
- Rembrandt - some fugitive colors
- Winsor Newton - some fugitive colors
- dakotapastels.com - a good supply of general pastels and materials
- schminke pastels - www.schmincke.de
- She hasn't tried pan pastels because she likes using a sanded surface and sticks.
- Blaire low odor fixative - only uses when has to ship something. Applies a light coat after knocking the excess pastel off by tapping substrate back.
- Can make your own gray pastels by saving dust, moistening it with water, rolling and letting it dry slowly on a paper plate
- In addition to water can use rubbing alcohol, turpentine etc to resolubize pastels in an underpainting
- packing peanuts can be used to blend. Also tortillons, stomps.
- Can remove pastel with old bristle brush or stencil pouncing brush.
- Recommends a set of at least 72 because pastels are not a blending thing.
- generic baby wipes, barrier cream- gloves in a bottle
- sanded substrate - whisper pastel on lightly stroking in different directions
General application of pastels: usually bottom is hard, middle layers medium and top layers soft.
Short discussion on anatomy + handouts.
Color temperature, edges & value: In general soft edges and cool colors recede, hard edges and warm colors come forward. In the sky faraway clouds are warm while close clouds are cooler.
The lightest part of the darkside is equal to the darkest part of the light side. Use a value card to help you. Generally paintings only range about 5 values except for very small highlight and darklight areas.
Working from life is better than from a photo because our eyes see 2000 colors while the camera only sees 400. Study the model 5' before starting to work.
When Terry does a portrait she talks to the person for about an hour to learn about their expectations, personalities and how they move. She does take pictures. Does color study. Tries to get an initial 1 hour setting at the beginning and the end of the painting.
Discussed how eye highlights are not in same place. Light enters eye on one side and where it comes out the cornea is lighter. Color banding like old masters, Sargent and Flemish artists; Forhead yellow, face red (nose even redder), neck blue. Violet around eyes, olive green tones around the mouth. Helps skin glow and appear more 3D. Bottom of cornea and eyelid shape are different and distintive on people. Lightest value in eye - lightest value in face - No white.
Artists mentioned; (look at paintings you like to study how they were done.)
- http:/davidkassan.com , can download artist anatomy. has articles in drawing magazine.
- www.judithcarducci.com
- http://www.everettraymondkinstler.com/ (one of the originals in the www.portraitsociety.org ?)
- http://www.danielgreeneartist.com
In the morning we learned how to get our proportions correct using triangulation and a dowel painted with medium gray stripe. Basically you pick one point that you always measure from. Then you draw a second point. Then holding the dowel at the correct angle from the 1st point to a 3rd point you make a mark. You do the same from the 2nd point to the 3rd point. Where your two lines intersect that is your third point.
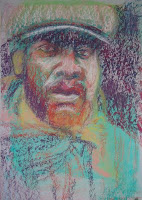
In the afternoon we did a underpainting, damped it down with a brush to redissolve the pastel then painted some more over the top. Here's my unfinished picture.
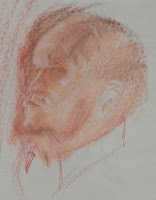
 A 15 minute conte sketch of a man from Tuesday night sketch club.


